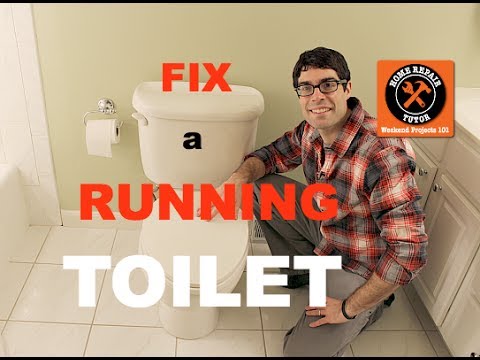
Running toilets are a pain in the rear end, right? Hey, DIY nation! It’s Jim. And today I’m going to show you how to stop your toilet from running. And no, I’m not talking about it running on the track. I’m talking about water being wasted by dribbling down inside the toilet tank.
There are 3 most likely causes of this. A flapper valve which is not closing as it should be, a chain caught in the mechanism, and an overflowing cistern which is trying to fill the cistern tank too full.
The solutions follow:
Tools Needed
You’re going to need a limited number of tools. It’s not going to take you forever—maybe 15-20 minutes max. And you’re going to save yourself a considerable amount of money doing it yourself. So let’s not waste any more time. Let’s get started. All right. Here are the three tools that you need: you need a pair of wire cutters or snips. You will need something that can cut wire; a flathead screwdriver; and a Philips head screwdriver.
Now I’m going to reveal to you the best ways to stop your toilet (WC) from continuously running. No, I’m not talking about it working on the first flush after you press the button. I’m not talking about a water leak either.
Faulty Flapper Type WC
I’m speaking about water being lost by constantly dribbling water in the toilet pan.
You’re going to require minimal tools. It’s not going to take you much time, perhaps 15-20 minutes maximum. And you’re going to avoid yourself spending a substantial quantity of cash doing it yourself. So let’s not lose time. Let’s get going. O.K. Here are the 3 tools that you require: you require, a set of wire cutters or snips, a wire cutter; a flat-head screwdriver; and a Philips head screwdriver.
So that’s it. Those are the 3 tools that you require. All right. Let’s go into the wonderful land that is the toilet tank. The very first perpetrator you must take a look at is the flapper. Usually, the flapper ends up becoming worn or broken due to the fact that mineral deposits build-up on it, from simply routine usage, and being immersed in water and dried repeatedly.
When you look you’ll see a bit of an imprint in it. Simply change it out with a universal flapper or a flapper that works with the brand name of a toilet that you’re utilizing. This costs, most likely, about 5 pounds or less and is solved when it is changed.
Chain Caught Between Flush Valve and Preventing Correct Flush Valve Seating
The 2nd factor in causing the fact that your toilet continues running is due to the fact that when you flush it. When you bring up on it, and you let the handle go the toilet, the chain drops and gets stuck in between the flush valve and its seating.
If that’s the case, the water’s dripping between the flapper and the flush valve. So the repair solution you need is to cut back your chain. The one that links your flapper to the toilet handle. And you must just leave a bit of extra length, to retain some slack in it.
You do not want to spend a heap of time or money on this. So simply cut it with the wire cutters or your tin-snips. Use whatever tool you have on you.
Float Valve Incorrectly Positioned
The 3rd cause of water continuing to run in your toilet bowl after you have flushed might be that the running is due to the fact that the water is discharging by leaking into the overflow drain.
That suggests that the water level in the tank is too high up when the float stops the tank filling. So, in order to solve this repair, exactly what you have to do is to change the float level.
There are a number of alternative types of floats in the toilet cistern. However, this is one and I’ll reveal to you the 2nd one in a minute. However, you have to change the height of this. Basically, the issue is this float is too high.
So in order to decrease it, there’s a little change to the screw here which must be done. To decrease the float level, what you need to do is to rotate this screw with your screwdriver to the left. That will decrease the float level and, in essence, likewise lower the water level in the toilet flush water tank. A basic guideline is to make sure that the water level in the tank is anywhere from 1/2 inch to 1 inch below this overflow pipeline.
Next, you can make a mark on the overflow pipe with a marker-pen and make certain that the water level increases to that point. If you have a traditional float ball, you’ll have to change it instead of the float cup to change the water level in your toilet cistern. So once again, if your water level is too elevated, you will have to ensure that this floating ball drops gently. Due to the fact that when the water lifts up, the lower, the float ball is lifted as well.
You can change the height of this floating ball in two different ways: you can flex/bend the float arm, or, as in this case, there is a screw on-site that you can tighten up or loosen up. When you do that, it’s extremely small and hard to adjust, but it will raise or decrease the float ball level.
So that’s how you change the water level with an established plan like this one. If you have a diaphragm fill valve, you must alter the height of the float arm here, to vary the water level in the tank. Once again if the water level in the tank is too elevated, your toilet will continuously run since all the water’s going to descend into the overflow pipe.
So if you could look into this tank, the water would be so high that it’s just over-running into that pipe. So we will recreate that for you today.
So if I rotate a screw counter-clockwise, the float arm elevates itself and the water reduces its velocity into the overflow pipe. So exactly what we seek to do or exactly what you will have to do to stop this from occurring is lower the float arm by turning this screw on top of the diaphragm fill valve clockwise.
So turn it clockwise, and lower the ball. You’ll reduce the water in your toilet tank and that should stop the toilet from running. If you’ve done all these remedial works, and your toilet is still running, it might be due to the fact that you now have a bad fill valve.
The method used to identify if this float cup does not go higher whenever the water in the toilet tank is filling. if that holds true for you, simply go on and change this entire part-unit.
A new universal fill valve will cost possibly 10 pounds. And this is a very simple, and quick, piece of repair work that you can certainly do yourself and not have to spend lots cash while doing so.
Conclusion of our Article on “How to Fix a Toilet That Keeps Running”
Well, we do hope that this article assists you with your very own running toilet. If you have a specific concern, constantly try to understand the science. Keep in mind that if you have not before now, done so, you can register for an e-mail newsletter at HomeRepairTutor.com. It’s really indicated to assist you to stop now losing time or feeling overwhelmed with your very own DIY tasks.
You’ll conserve lots of cash at the same time by reading a great deal of the ideas and techniques that I have. So till the next video, I hope you have an excellent day.
I’ll talk to you again before long! It was a Good idea that I cleaned-up this toilet prior to the time I did the tutorial due to the fact that we’ve been a little too up-close and individual throughout this entire time if you understand exactly what I suggest.