I am going to show you how to tile a bathroom, in my bathroom. In other words I’m going to show you how to do stack bond wall tiling.
Here are some of the things that we’re going to require in order to complete the job. We have some power tools. We have spaces, we have wedges, we have a notched trowel to spreading our glue, screws. And, of course some measuring tape, plus a pencil.
Below me here I have some mastic glue for spreading. We have a tile cutter, a mixing paddle, a bucket, tiles of course, a spirit level, and also some timber here for our setting up of tiles.
First up, what we’re going to do is take some measurements in order so that we can establish our datum line.
We need our datum line to be perfectly horizontal. We’ll use our spirit level to check that. We’ve calculated how many tiles we’ll be using. In this case, I’ve calculated six tiles, so we’ll have six tiles going from this point upwards.
The reason for the datum line is that we rely on this as a perfectly horizontal area to start with.
Floors can be uneven and could pose a big problem if we were going to rely on the floor as a starting point for our tiling, so that’s why it’s important to use our datum line to begin tiling.
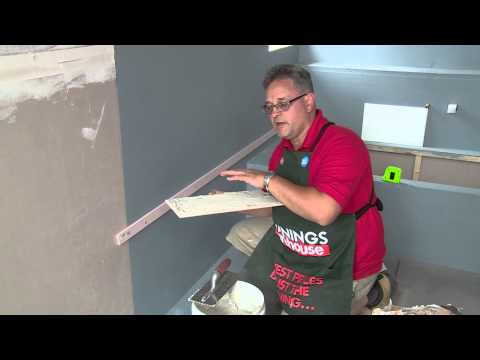
We’ve established where our studs are, and now, what I’m going to do is to simply drill-in with some screws and we’re going to place our bit of timber to establish where our datum line is. We’ll grab our spirit level as well, and check to make sure that we have a perfectly horizontal line.
I’m pretty happy with that, so I’m going to screw that in now. We’ve already prepared our wall here with waterproofing. The membrane does require a specific glue.
It’s important that you read the packaging before you begin tiling, to make sure that it specifies or stipulates that it’s suitable for waterproofing.
This is a very important point. One little tip is just by simply placing your tile here and, using a pencil, you can do a little mark and just move your tiles in, and that will give you a good idea as to what type of cut you’ll expect to find at the end. It works really well, so I’m happy with that.
Let’s mix up some glue. Put a little bit of water in to begin with.
To Tile A Bathroom – “Make Up the Glue to a Toothpaste Consistency”
A little bit of powder. I’ve mixed up my glue now, so as you can see it’s a nice toothpaste consistency, maybe a little bit thicker than toothpaste but that’s ideal for tiling.
We’re using our notched trowel here. We’re going to put a first layer of tiles. Check to make sure that we’re level. We’re going to use our spaces and, of course, our wedges. The wedges are important because they will actually help us to adjust as we go along the level of the tiles if need be.
We’ve got the tile. Initially, we’re just going to spread some glue behind the tile and lay that first row. Just spread your glue. Make sure you get plenty of glue. As you can see I’ve spread the glue nicely around the tile. If you don’t get it all the way to the edges it’s not critical.
When we press the tile along to the wall the glue will compress and spread out evenly. So put the first tile along like so. Clean any excess if need be. And, what we’ll do is we’ll put our wedge. This will allow us to adjust as we go along. Okay, I’ve got the first tile on there nicely, so what we’ll do is we’ll continue the same process through to the back.
We’re using a millimeter spacer; millimeter is a standard wall spacing for tiles, so this is what we’re using today.
So just place that there initially. You can adjust by using your wedge, and in that way we can be assured that we have a nice straight edge, and we’ll be making some adjustments if we need to.
What we’re going to do now is simply place our spirit level on top and make any adjustments as required. We need to actually use our sight now to see if there’s any spacing underneath, and make the adjustments accordingly. Just keep an eye on your spirit level, making sure that you are level. You can make the adjustments. Now we can begin by applying more glue, enough for a couple of rows, and we can speed up the process.
It’s important to not let this sit too long. It will skim, it will stop the tile from sticking onto it, so it’s important that we work quickly here. I’m pretty happy with that. It’s looking fabulous. Over here you’ll notice I’ve left a bit of glue out.
We do need to cut a tile here so I’m just going to place a tile over here and mark it, and then we’re going to our tile cutter so we can cut it. Place your tile, move it to a millimetre spacing approximately.
You’ll be able to line it up with the tile below. Take a pencil, or your marker, and just mark the tile, and now we can cut it. We’ll place the tile cutter, or the wheel on the tile cutter here, over the line that we have just marked.
We’re going to score it once and we’re going to snap the tile so we can cut it. Quite simple really. Just place your tile there, checking that you’ve done the right cut. In this case it’s perfect so we’ll put some glue behind the tile and just place this tile on the wall.
I’m happy with that row.
How To Tile A Bathroom – The Finishing Touches
We’ve completed all our tiling. Now we’ll remove our datum line, our timber here that’s keeping everything horizontal, and we will continue tiling down to the floor.
Do you need wall and floor tiling done in Shrewsbury, or throughout Salop? If so get a quote from our plumbing professionals by calling on the phone number above.
As found on Youtube